
My Panasonic Lumix GH5 has been my best travel buddy since mid 2019. I’ve always enjoyed creating photos and videos on land. When I started diving in 2020 and fell in love with it, I knew it was only a matter of time before I needed an underwater housing to take my hobby underwater. Three years later, at the end of 2022, I decided to get the Seafrogs underwater housing for my Lumix GH5.

The Seafrogs Meikon Underwater Housing for the Panasonic Lumix GH5 is the only one I found on the market with an affordable price (January 2023). The other ones require an investment of at least 1,500 USD which, for me, were way above budget. This blogpost will give you a full review about my experience with the following Seafrogs underwater products for my Panasonic Lumix GH5:
- Underwater Housing
- Dry Dome Port incl. Neoprene cover
- Lightweight aluminium tray
- VPS-100 Pre-Dive vacuum leak check system
- Coil Lanyard
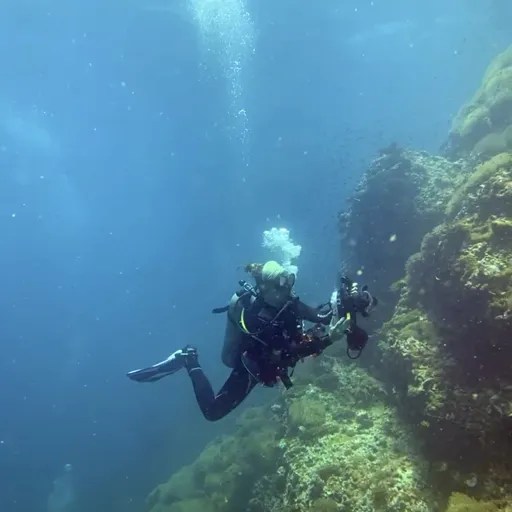
Click here to see my underwater footage!
Setup & cost overview
In the next few chapters I’ll introduce my whole setup when I go on camera dives. I prefer filming with natural light and therefore haven’t used any strobes yet. So far, I’ve dived with the housing in warm salt water (29 degrees and above). Please check the details of items included in the price of each product before purchasing, as I won’t list them here in detail. This blogpost focuses more on my personal experience and useful advice regarding the whole camera diving setup.
| Product | Price |
|---|---|
| Seafrogs Meikon UW Housing for Panasonic Lumix GH5 | 469 USD |
| Dry Dome Port & Neoprene cover | 204 USD |
| VPS-100 Pre-Dive vacuum check system | 107 USD |
| Aluminium Tray | 120 USD |
| Silicone grease 5ml (2 pieces) – seafrogs | 9 USD |
| Coil Lanyard | 13 USD |
| Total (excl. shipping fees) | 922 USD |

Seafrogs underwater housing for Panasonic Lumix GH5
The Seafrogs underwater housing for Panasonic Lumix GH5 weighs around 1.5 kg. It allows you to take your camera up to a depth of 40 meters. The housing provides mechanical controls for the main camera functions which are all labelled and therefore easy to find. There is a big shutter button as well as a dedicated button for filming. Despite its ergonomic design it is a pretty large housing which makes it a bit more challenging to take it with you in case you move around a lot. If you would like to travel with the housing I recommend to take some extra preparations (read more below in ‘thoughts & advice’).

Inside the camera is a water detector which beeps when liquid enters the housing. In case this happens you should make your way up to the surface. Update May 2024: The detector stopped working after around a year but you can buy a replacement in the Seafrogs shop.
The shutter wheels as well as the zoom function of your lens are not supported by the housing. If you are filming in M mode you can therefore only set the shutter speed by using the Q-Menu (F2) or you need to reassign the buttons. You unfortunately also can’t use wet-lenses and are therefore a bit more restricted in terms of creativity (find more about this topic below).
Overall, the Seafrogs housing is of good quality, particularly given its relatively low price. It includes two O-rings for the main door and some spare parts, such as those for the vacuum seal. Due to its size and positive buoyancy, I recommend diving with the aluminum tray. Holding the housing underwater without the tray while trying to press the buttons is nearly impossible for me, given my small hands. When purchasing the housing, remember that the standard port supports only certain lenses. Depending on the lens you intend to use, it might be worthwhile to consider buying the dome port.
Read more about how I became a dive professional!


Dry dome port & kit dive neoprene cover
The Seafrogs underwater housing for the Lumix GH5 has an interchangeable port lens system which allows you to switch from the standard port to the dome port. The main reason why you should get a dome port is because you can use more lenses than the standard port allows. Apart from that you can also play around with split content (half over water/under water). The dome port is not comparable to a wet wide-angle lens! The look of your underwater footage fully depends on the lens you use.
I highly recommend to purchase the neoprene cover as well to protect your dome from getting scratches. I always take it diving with me and put in on before handing my camera to the boat crew. While it is quite easy to switch the standard and dome port, I wouldn’t do it on a regular basis just to reduce leakage risks. Watch this video if you are planning to change from the standard to the dome port.
Update December 2024: Despite my efforts to keep the dome away from potential harms, it did get some scratches over the years. I think this is pretty hard to avoid as even tiny sand particles can slightly scratch the acrylic material. The scratches don’t affect my footage underwater, but on land I need to marke sure to work with the sun – otherwise you can see them. If possible, you could invest into the glass version straight away to avoid spending that money later on.


Lightweight aluminium tray
The aluminium tray is an accessoire you should definitely get. Given the size and buoyancy of the housing, it’s almost impossible to only hold it with your hands. The tray not only makes handling your camera system easier but also allows for the attachment of additional accessories like strobes and a safety strap. Plus, it makes it much easier passing the camera system to others.

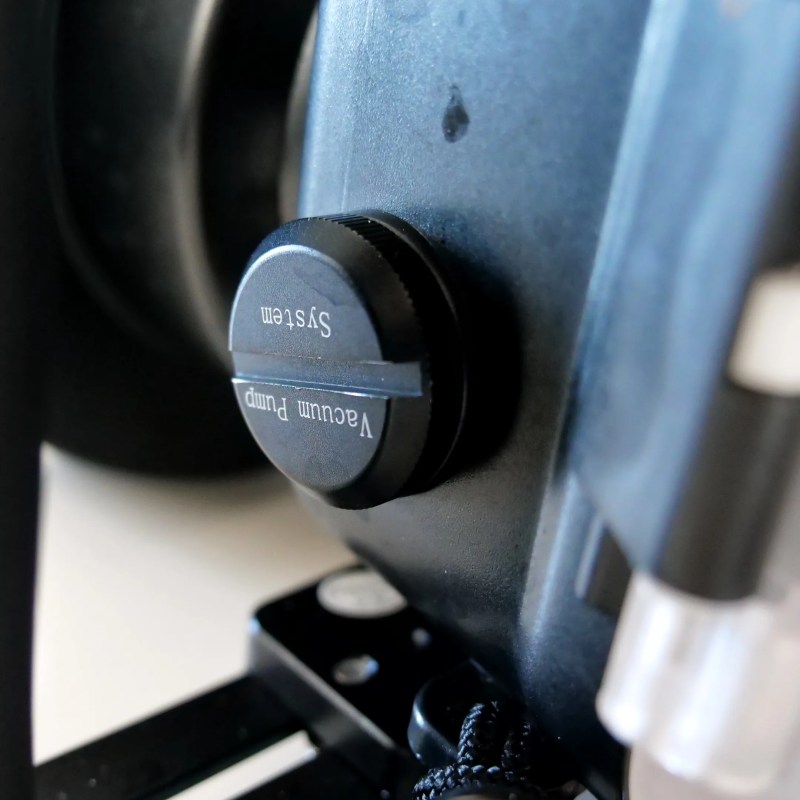
VPS-100 pre-dive vacuum check system
The pre-dive vacuum check system is a good tool to make sure that all seals are watertight before submerging. It gives a peace of mind, especially when your housing hasn’t been in the water for a while.
Important: The VPS-100 is a pre-dive check system and not supposed to be used underwater. I assumed that it should be used underwater and had it on for two dives. Unfortunately it leaked on the second dive. Even though I know some people who always dive with the vacuum seal on I don’t recommend to do it! I’m still traumatized from watching water drops entering the housing and the alarm starting beeping at 18 metres depth. Luckily my camera didn’t get wet. Also I was able to change the battery of the vacuum valve and it is still working.


The great thing about the pre-dive vacuum check system is that it allows you to verify if all seals, especially the main door, are airtight. What I don’t like about it though is that after performing the check and before going diving, you have to replace the vacuum valve as the VPS-100 should not be used underwater. This means you can’t be sure the switched valve is still fully airtight. Also with this specific housing, you need to remove one arm of the aluminium tray each time to access the vacuum seal and to pump out the air.
Before buying the VPS-100, I assumed it was meant to be used underwater, which made more sense to me since I want to ensure the vacuum is still intact while diving. It turned out though that I can’t check all seals before going diving as the vacuum valve has to be switched after the pre-dive check. I hope a future version will allow underwater use. Until then, I’d say the VPS-100 is nice to have but not essential. Constantly switching the valve poses a potential leakage risk, and having to adapt the aluminum tray each time is an added inconvenience.
These days, I use the VPS-100 every few weeks, especially if I haven’t been in the water for a while. It just gives me peace of mind knowing that all the buttons are still airtight. However, for the daily use, I find it a bit too much of a hassle.

The correct use of the pre-dive vacuum check system is the following:
- Remove the vacuum pump system lid 10-30 minutes before your dive.
- Attach the vacuum pump system valve & unscrew the protective cap.
- Press the button to turn on the LED inside the valve, it should blink red indicating ambient atmospheric pressure.
- Start pumping the air out with the pump until the LED turns green.
- Screw the protective cap on to ensure airtightness and observe the LED for 15 minutes.
- If the LED is still blinking green after 15 minutes it means there is no air leakage.
- Open the protective cap, press the button to release the pressure & turn the valve LED off.
- Remove the valve and place the original valve into place (make sure the o-ring is still there).
- Safe to dive!
Coil lanyard
Lastly, I highly recommend purchasing a coil lanyard and always attaching it to your BCD while diving. The hand strap that comes with the housing is not sufficient, as it’s easy to let go, and the positive buoyancy of the housing would cause it to float away quickly.
When the boat crew hands me my camera, I immediately attach the coil lanyard to my BCD, ensuring I have both hands free if needed. The quick release allows me to keep the camera close or let it float a bit further away. Overall, the coil lanyard is incredibly helpful and provides added safety for both you and your camera.


Advice based on my experience
Overall, I’m very happy with my camera setup and would recommend the products mentioned. Compared to other housings on the market, the Seafrogs line is quite affordable and offers good quality. It provides an excellent entry point for those interested in exploring underwater photography and videography with the Lumix GH5. However, if you are planning to become a professional underwater photographer and videographer, it might be worth investing more money into a housing with an integrated vacuum check system and mechanical lens control for zooming.
Due to its size, the housing can be a bit challenging to handle, especially in strong currents, but using it underwater is great fun! I’ve also tried diving with just my phone and the Sealife phone case, but it’s a completely different experience. It’s like taking photos on land with your phone versus a camera; I always find it more enjoyable to use my camera.
Last but not least, I have some advice I’d like to share – things I wish I had known when I first purchased the housing.
1 Transporting the Seafrogs underwater housing for Lumix GH5
The ideal solution to transport the housing from your house to the boat would be to get a proper crate or camera bag. Due to budget limitations, I’ve found a more unconventional solution (but it’s been working fine!).
I usually wrap the housing (incl. aluminium tray) in a towel and then put it in my feelfree 30 l dry bag (here is a similar model). The vacuum pump and accessoires I keep in a smaller bag which also fits into the backpack. This method works really well for me! It also makes it possible for me to transport both my housing and my dive bag on my scooter.


2 Travelling by plane
When I first travelled with the housing to Thailand I made a big mistake: I left the o-ring in the main door & closed the housing. During the flight it created a vacuum and I couldn’t open it anymore. In case that happens to you as well you can unscrew the top valve and release pressure through there. Then the housing should open again. My advice is to remove the o-ring and not fully close the housing when travelling by plane.
Another big question that comes up is how to transport the housing on a plane. To me it was clear that the housing had to travel in my carry-on as was way too valuable and fragile to go with the checked luggage. I managed to pack the whole kit into my travel backpack. When moving it next time I will probably wrap it in a lot of clothes and have it in my checked luggage. Update December 2024: It’s best to transport the housing in your carry-on and put the remaining bits in your checked luggage. I found it too risky to have the housing in my checked luggage.
Read more about my latest liveaboard experience in Egypt!
3 Buoyancy & weight system
The Seafrogs underwater housing for Lumix GH5 is very buoyant and much easier to use with some weight. Using weights for underwater housings was another point I wasn’t aware of when purchasing it. So like I did with my transport system on land I had to come up with an idea that didn’t require another investment. To make my housing less buoyant I use the trim weight pocket from my BCD and attach it to the aluminium tray before the dive. I usually use 0.5 kilos (the smallest weight on the boat) which works really well. Other options could be to use a trim weight system or floats.
Update May 2024: I have adjusted the weights in my BCD and stopped using the trim weight pocket. It detached in a few occasions while diving which wasn’t ideal and is a potential harm for corals and marine life. The new solution works absolutely fine!


4 First time testing before using
Before taking the housing on a dive I recommend to do some testing in a pool without the camera. This way you can find out how to best attach your weight system and to get a first feeling for the housing including the whole setup. Put a paper towel into the housing to make sure that all buttons are sealed properly. If everything is alright on the first try I would then do another one with the camera inside.
5 Maintenance
To use your Seafrogs underwater housing as long as possible it’s important to properly maintain it before and after the dives. After the dives I wash the housing with clean water and press the buttons to make sure there’s no salt water left behind. I also always remove the o-ring, put grease on it and then store it in a closable plastic bag. When I’m not using the housing I close the door and keep it in a safe place. Additionally I make sure to cover the dome with the neoprene cover unless I’m using it.
Update May 2024: Don’t make the mistake to only rinse your housing with water after the dives. Buy a huge bucket, fill it with water and soak the housing for a few hours after each dive day. Make sure to press each button 15-20 times to avoid salt building up. In case some buttons get a bit stuck you can use some silicon grease. I remove the o-ring in the housing door and reapply silicon grease every 5-10 dives.
6 While diving
As mentioned above I only take the neoprene cover off when I’m in the water. While still on the boat and when handing the housing to the crew I always have the cover on to avoid scratches. It’s recommended to put the housing into a tank of clean water before and after the dives. On the boat I’m diving we don’t have that so I rinse it after the dives and give it another clean at home.
I also usually don’t change the battery in between the dives to minimize the risk of getting a leak. After two 45 minutes dives I usually have around half of the battery left. I set up the whole system at home in the morning as I don’t want to feel rushed on the boat. Also wavy conditions might make it harder to perform the battery change properly.
7 Wet lenses & flexibility
Over the past year I met some other videographers who are using wet lenses. There are wet lenses focused on macro photography or the opposite would be wide-angle lenses. Wet lenses are external lenses that are mounted outside the housing and specifically made to use underwater. This also means that you can mount and dismount them while diving as you please.
With the Seafrogs housing for the Lumix GH5 you unfortunately can’t use wet lenses. The standard port does have a 56mm screw, but it’s not made for the use of wet lenses. If you screw on a wide-angle wet lens for example, you will most likely get a weird vignette look. I tried this a few times without any success (I wanted to achieve that wide-angle look really badly).
In my opinion, this is the biggest downside of the housing. You have to decide which lens to use before the dive and can’t change it. If you choose a macro lens and a whaleshark turns up, well, unfortunate. I personally only use my 8-18mm lens as I prefer slight wide angle footage and filming the ‘big picture’. Therefore I found my ways to not be bothered by this limitation.

Final thoughts
Overall, buying the Seafrogs underwater housing for my Lumix GH5 was a worthy investment. I’ve done many dives with this setup and created beautiful underwater footage. Balancing filming on both land and underwater required some adjustments, but I’ve found ways to manage the weight of the setup. And yes, my arm muscles have definitely grown along the way!
Seafrogs provides a fantastic, budget-friendly alternative with great quality. It’s amazing for many reasons. Not only can I share the wonders of the underwater world with my family, but also with others on platforms like Instagram. It opens up opportunities for me to offer underwater photography and videography services. However, what I truly enjoy the most is editing the footage. The underwater world is already stunning, but with the right music added, it becomes even more impressive. I could watch the videos over and over again, mesmerized by the beauty beneath the waves. At this moment in life, I don’t feel the need to upgrade to a different housing or add strobes. (Update December 2024: After two years of using it I do want an upgrade and use the full potential of my lenses! But I guess this is all part of the journey and growth. It still is a great housing to get started, to learn and get better.)
The Seafrogs underwater housing for the Lumix GH5 suits my needs perfectly. Do you have any experience with underwater housings? Or are you interested to get started? I’d love to know in the comments below!


